
There is a subtle difference between taking a picture and composing a photograph.
This tutorial is going to show you how to take bland, lifeless images and transform them into photographs that capture your viewer’s attention–because we all know you want to do more with your photos than just prove where it was you traveled.
Tell a story. Inspire your viewer. Remember why it was you took the photo in the first place. And keep in mind, when it comes to photography, you’re really not ‘taking’ anything. You’re making art.
8 Tips To Composing Better Travel Photographs
1) Find a subject
When you’re traveling, you are completely immersed in the scene. Your photographs, however, are a flat image that only show a fraction of the story. As a result, it’s important to focus on what makes a particular situation photogenic. Simplify the scene. Create a focal point. This is your subject.
Take the following example:
Image 1
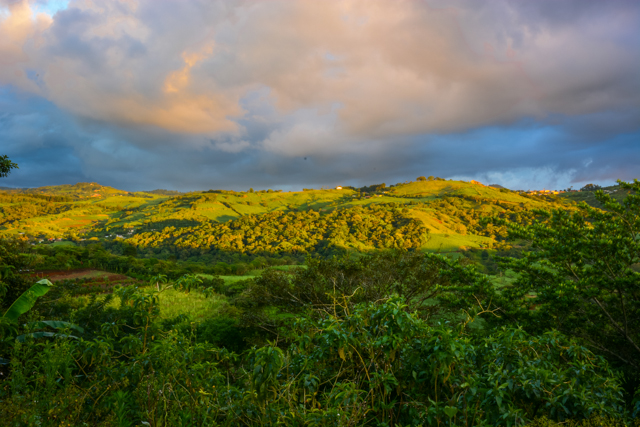
This was a photo taken from our housesitting abode in Costa Rica. You probably find your eyes scanning the picture for something to look at, but there’s ‘nothing there’. It only shows a fraction of the spectacular view that greeted us from the kitchen, and it’s difficult to tell the grandeur of the landscape from the photo alone.
Your brain likes to have something to focus on and then expand from. Here’s how I slightly changed my strategy on the mountain to add a subject.

See what a difference that made? Now we have a subject, and as a result, dimension. To achieve this I decided to step back and add a bit of the road and the houses perched on the mountain to the frame. Not only does my viewer have something to look at, but I have a context to the personal memory of the photo as well. Compared to the initial image it is quite a bit more interesting, don’t you think?
Finding a subject is one of the most important things to keep in mind while photographing. If you don’t have a subject, you’re essentially not taking a photograph of anything (which will be awkward to explain to those eager eyes of friends and family back home). Rather than having to explain all of the things the viewer can’t see in your photographs, let your photos do the talking for you.
Next time you’re taking a picture, I challenge you to ask yourself what you are actually taking a picture of. If you find yourself answering “all of this” and waving your hand around at everything in front of you, then you might want to re-evaluate your shot.
2) Rule of Thirds
Image 1
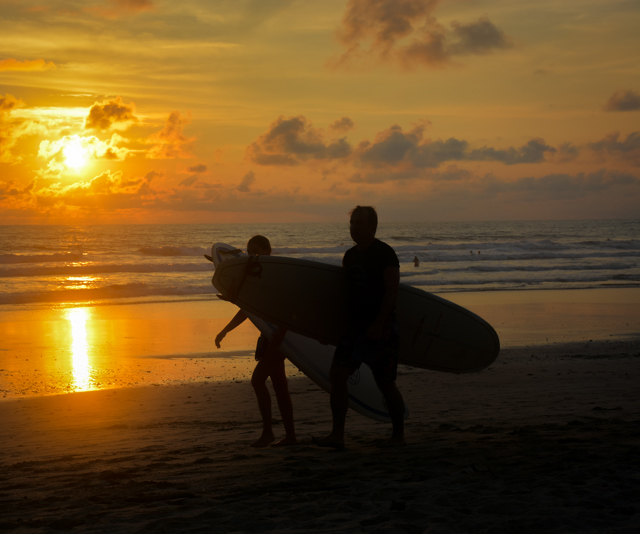
Image 2
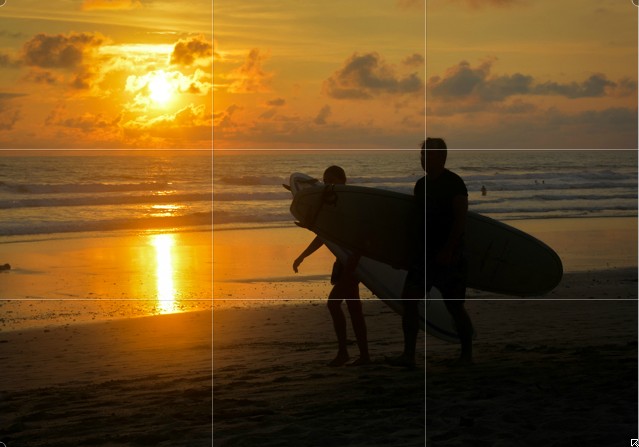
The rule of thirds is a great tool to help frame your subjects and make them more appealing to the eye. Imagine that your photo is broken into thirds both vertically and horizontally. The rule of thirds implies that the best place for your subject is at one of the crosshairs of these lines. It makes photos more interesting than just putting your subject smack dab in the middle of the frame. Here I have placed the subject on the line of the right third, giving the surfers room to walk to the left (thus implying motion, adding another element of interest). I have also placed the horizon on the top third line which happens to intersect at the subjects’ heads. When you choose your subject, try to place it along one of these lines for a more interesting photo. Of course, rules are made to be broken, too. We’ll get more into that later.
On many cameras, tablets and smart phones there is an option to show these rule of thirds crosshairs in the viewfinder while you are composing your photo.
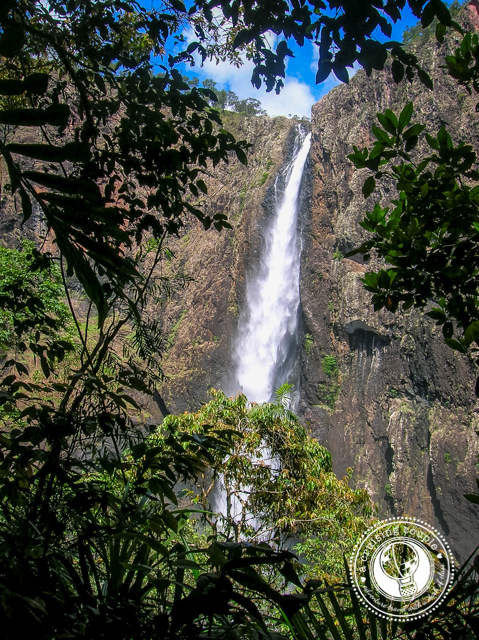
3) Leading Lines
Image 1

Image 2
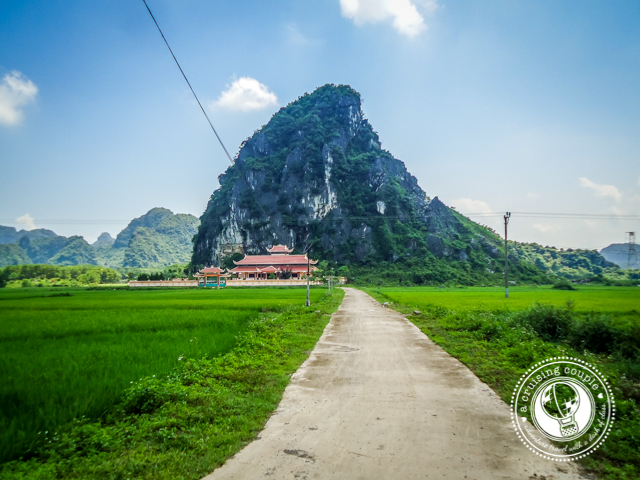
Another great tool to keep photographs interesting is leading lines. Leading lines give the eye a path to follow. It makes your photo more than just an image, but also a journey for your eyeballs! Leading lines work well when you want the viewer to start in the foreground and work their way back to the image. They can also be used diagonally. This is a great way to give your two dimensional image more depth and perspective. Roads make for pretty great leading lines, but you can use anything from railings on a cruise ship to the line formed from water washing up on the beach.
4) Empty Space
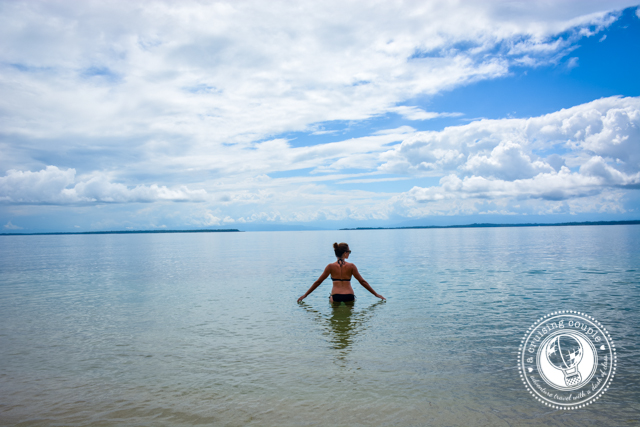
Make your subjects pop, add simplicity, and invoke a sense of balance by utilizing empty space. By adding a large and open background, you can make your subject stand out. In this photo I decided to pull out and not only show you how beautiful Casey is in the water, but also how remote the location is. By combining the idea of using white space and what we’ll talk about next (natural frames) you can really make a powerful statement with your photographs .
5) Natural Frames
6) Be Creative
Maybe the hardest part of photography – but by far the most rewarding – is discovering new ways to take photos of common images or landmarks. For example, go ahead and Google image search the Eiffel Tower. I’ll wait… Okay, see! The first 100 photos all look the same! If you just walk up to the Eiffel Tower and take a photo like the millions of other tourists around, you’ll only come home disappointed. And your friends and family will be unimpressed because they’ve seen an exact replica of the same photo a thousand times before. Instead, use your creativity to capture a unique element or story that speaks to you.
If you want to make your pictures instantly more interesting, try shooting from the hip. What typically happens when you want to take a picture? You raise your camera to your face and click the shutter. You just captured a picture that looks exactly like every other photo taken by someone who is 5′ 9″. Instead, try something new. Drop down to one knee and then take a picture (hip height). You’ll be amazed at the difference it can make. I challenge you to start taking photos that aren’t at eye level. Lay on the ground if you have to. Stand on a chair. If you’re a foreigner on vacation, nobody would expect anything less anyway.
After you’ve experimented with new angles, you can take that subject and look for a new photo all together. Look for reflections in windows, sunglasses or puddles. Try photographing at night, dawn, dusk. Different lighting and different people can give your photography a completely different look. Try (carefully) taking photos in the rain. Take a picture and then back up. Then back up some more, and then move in really close. The different photographs you can create are only limited by your creativity.
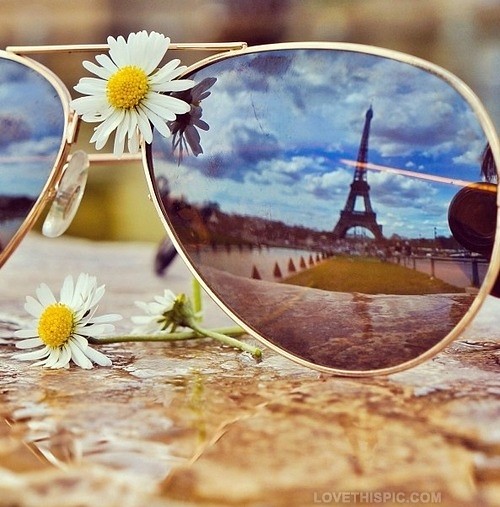
via lovethispic.com
7) Try to Tell a Story
“A picture is worth a thousand words.”

The best photographs are the ones that tell a story. Bring your images to life by considering things like emotion, characters, relationships, ideas and messages. Make the viewer think about what preceded the photo and the possible events that could have followed after it.
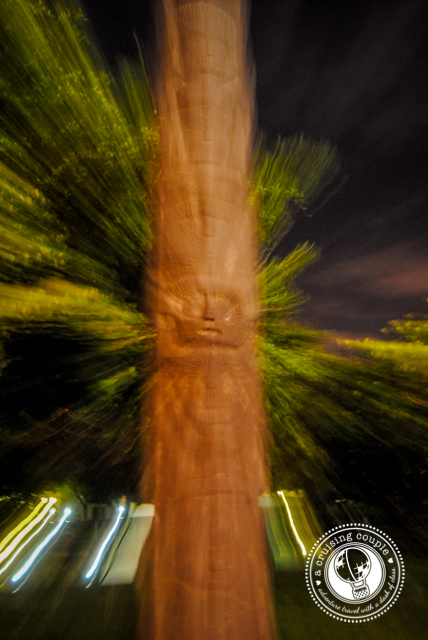
8. Break The Rules
Rules are meant to be broken, so don’t be shy about mixing things up a bit to let your creativity shine. Just remember that it’s probably not a good idea to break all the composition rules in the same shot. Be bold, be unique, and be you. After all, photography is an art.
These steps are just the tip of the iceberg when it comes to composing powerful photographs. However, I hope they have served to provide tangible steps towards taking better photos.
Do you consciously compose your photographs before you take them? What tips would you add to the list? Any travel photography questions you would like answered in the future?
Further Reading
~ Choosing a Camera: Helpful information and comparison of some of the top cameras on the market today.
~ The Exposure Triangle: Discusses the 3 parts of the exposure triangle and how they affect your photos.
~ Natural Light: Explains the different qualities of natural light and how to use them to your advantage.
~ HDR Photography: Explains what HDR is and how to use it.
~ Dan R Moore Photo Shop: Discover and purchase photos from around the world.


Good job, Dan! Hope things are going well in Mexico.
Thanks! We’ve just found a house and will be moving in for a month on Tuesday :-D Pics to come soon!
I use all my own work on my website and agree with all of your tips. I’ve watched tourists hold up their phones above their heads, snap a pic, while still walking, and I can’t even imagine how awful the photo must look like. The thing you didn’t mention and for most snappers is a must, is lighting. So many pics of people have the background all lit up and the faces in shadow. Finding the right angle so the people don’t have to squint and the background is still nice, is often difficult but worth the effort. The other thing to notice is what is behind the subject….is there a telephone pole rising out of someone’s head, is there a bunch of trash at their feet, etc. Most people don’t see that stuff till it’s too late.
Love what you say about lighting! It can make all the difference going during the right hours when the sun is behind the camera illuminating the subject instead of behind the subject which creates super dark shadows. Shooting at dawn and dusk will give the “softest light.” It’s a lot easier to look at the sun when it’s low to the horizon compared to 12 noon and will make photographing much easier. Great advice about paying attention to backgrounds as well :-)
Fabulous post, Dan! I’ve been trying to consciously take better photographs, and this was just the inspiration and guidance I needed to refocus my efforts. That shot of the Eiffel Tower is incredible! Thanks for sharing!
Heather recently posted…Saddle Up: My Revelations for the Year of the Horse
Glad I could help Heather :-)
Thank you! Beautifully laid out, and I really appreciate the photos which show the difference.
(Lots to learn.)
Lori recently posted…Words to Encourage
Thanks Lori! Glad it was helpful for you :-)
yay! I’m glad you’re posting in this series. I really want to get a DSLR but as I’m such a newbie photographer, I want to learn as much as I can before I jump into something I know absolutely nothing about. Great tips!
Samantha recently posted…New Year’s Celebrations in Costa Rica
Thanks for following along Samantha! There’s much more to come :-) If you need help picking out a DSLR you can check out our post on Choosing a Camera ;-)
Yes! I love these tips; the difference between the first couple of pictures is really striking. Good job on illustrating your point!
Sam recently posted…Safety in South America: Top Tips from Travel Bloggers
Thanks Sam. This one is for the visual learners :-)
A really good one! I also wrote a similar article long time back. Here’s the link http://renuka-voyagerforlife.blogspot.in/2013/01/how-to-take-better-travel-photographs.html
One simple tip for good photographs – Click only when you know you have exactly what you want in your frame.
Renuka recently posted…Nandi Hills – Beyond The Sunset
Great tip. Thanks for sharing :-)
All great tips and awesome photos! Safe travels!
Robert recently posted…Scuba Diving in Tioman, Malaysia (Video)
Thanks Robert! Safe journeys to you as well :-)
This is a really comprehensive yet not to long tips of photography…will be quite useful!
Ironically I am not a good photographer, yet my photos get published in print far more than my writing….I think its all luck for me, but Ill take some of your tips here and see if I can make that luck a bit more practice ;)
Adam Sommer recently posted…Legoland Kansas City One Year Later
Some call it luck, some call it skill :-)
Seriously some great tips. I only ever knew about the rule of thirds from photoshop haha. Ever since I’ve been on instagram following people who actually take ridiculously awesome photos (even the ones who are obviously using lightroom) it has given me ideas on how to capture something in a way I might not of before. I love seeing how people do different shots.
Devlin @ Marginal Boundaries recently posted…Comment on Day Trip to Valladolid, Mexico by T.W. Anderson
It’s been really helpful for us looking at photos of places we will be going to get an idea of what would make good photos. Some of those Instagram photos are surprisingly awesome aren’t they!
Thanks for the tips Dan, we’ll definitely consider these when we’re next out and about with our camera. Great ideas!
Andrew recently posted…Video: Three Months in Thailand
No worries Andrew :-)
Great simple tips to really focus on better composition. Thanks for the post, I like how you used side by side examples to really illustrate your point.
Thanks Kenin! Glad that was a helpful illustration!
If I may, I’d like to add the horizon line should be straight. It makes good sense of the photo. These are some great tips!
Great tip!
Great advices thanks for sharing!!
I’m a beginner photographer so my pics not always turn out as wanted, especially travel pics! :)
a Blonde around the World recently posted…VALENTINE’S SPECIAL: LOVE ON TOP OF STOCKHOLM
nice post, my only comment is that there are no rules so to speak…including the “rule of third”…thx for sharing
natan dotan recently posted…6 proven ways to take better wildlife pictures